Prerequisites:
- I suggest reading the "Intro to HTML" article before doing the exercises. It will help you with the terminology we will be using.
- If you don't already have an IDE (integrated development environment) would also suggest you read the "Setting up VS Code for HTML" article so you can follow along with the exercises.
Creating and Opening a Folder
- Create a folder somewhere you can locate it for your first HTML document.
- Then, open VS Code.
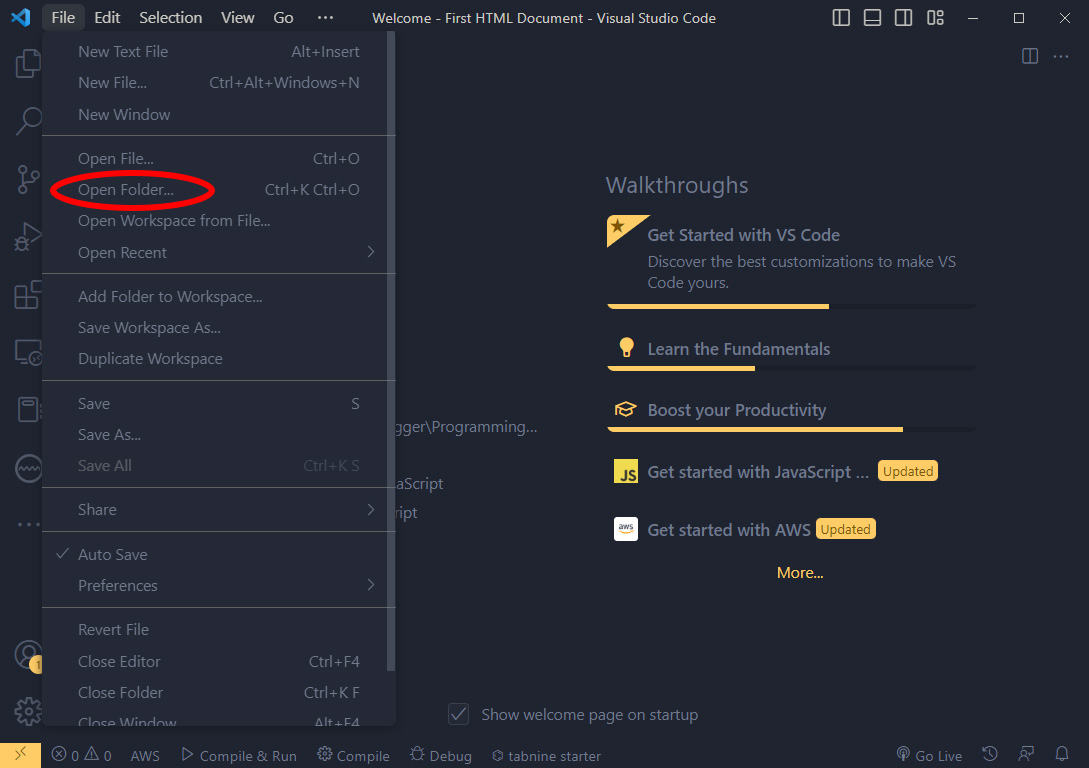
- Open the folder you created by clicking "File" → "Open Folder".
- Navigate to where you created your folder and select it.
- Click "Select Folder".
Creating an HTML Document
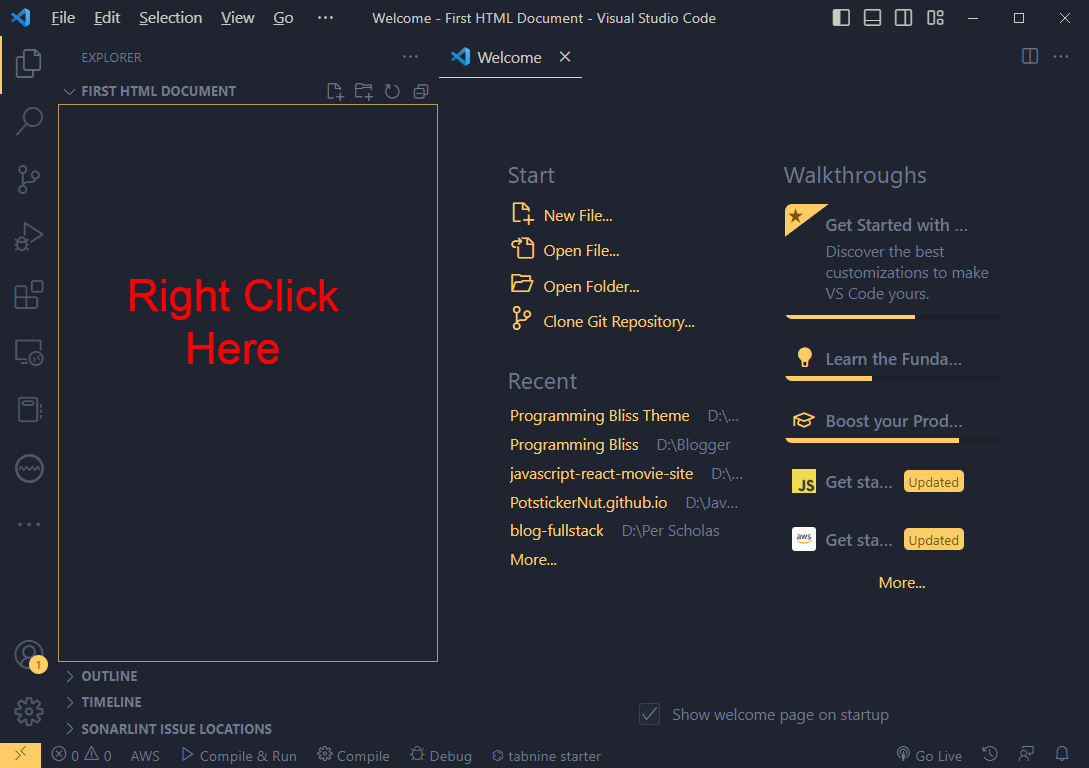
- Right-click (Control + Click for Mac) in the area below your file name.
- In the menu that pops up, click on "New File".
- Type the name of your HTML document with ".html" at the end. I suggest "index.html".
- An index.html tab will open on the right side of the window.
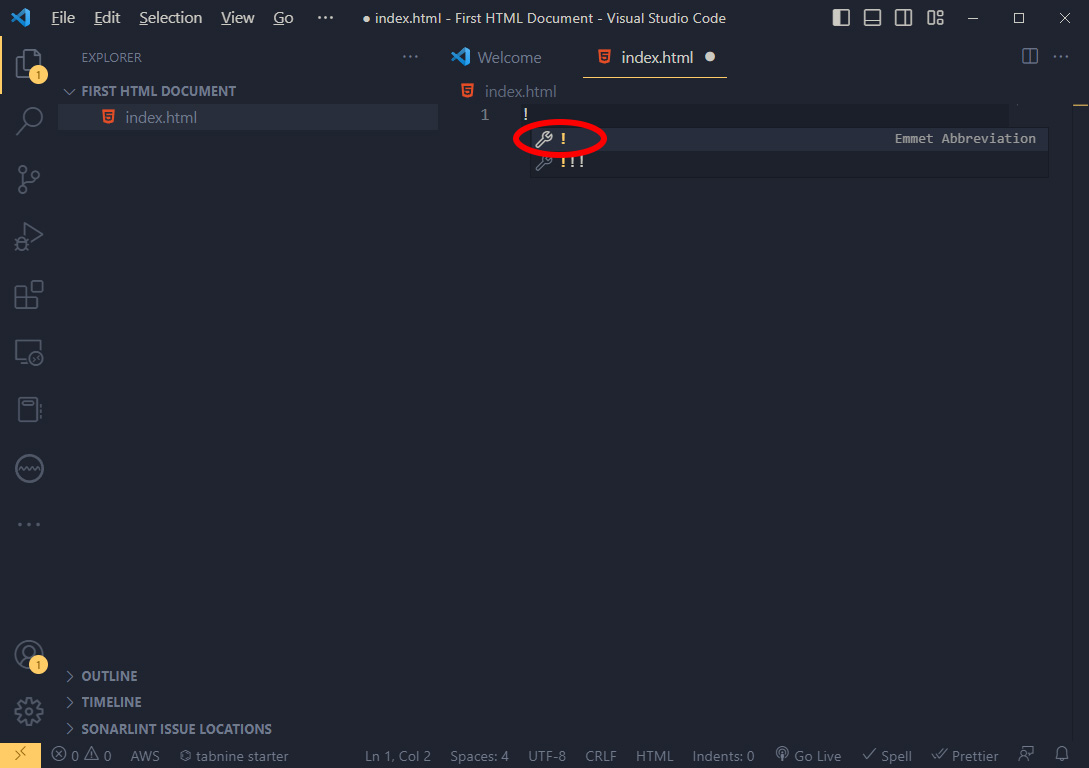
- Type "!" and hit enter.
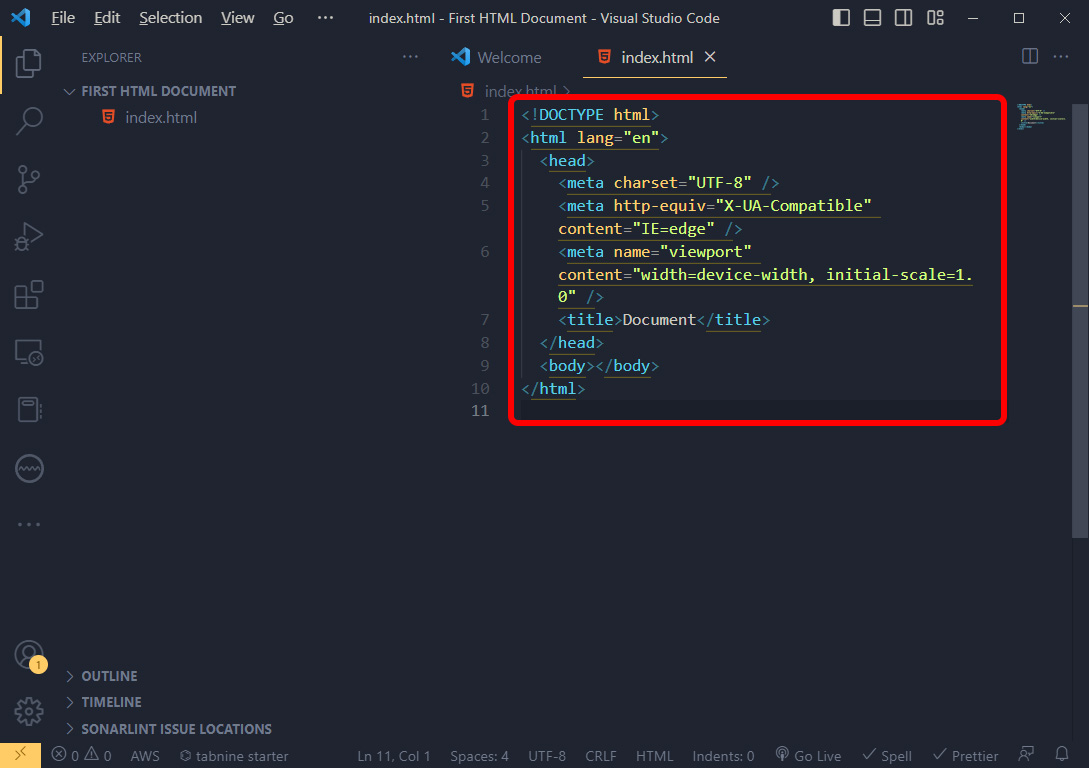
- A boilerplate of the doctype, head, and body will appear. If you aren't sure what that is, check out the "Intro to HTML" article.
- You've created an HTML document!
Adding Content
- The first we're going to do is change the title of the page. Look for the <title> Document </title> line in the boilerplate. Change the word "Document" to whatever you want to name your page. Here I changed the title to "My First Document".
- Now, look for the <body></body> tags. Here is where we are going to add the visible content.
- In between the body tags, we are going to add a <h1> tag. Click between the body tags and press enter. In VS Code you can type "h1" and press enter for the <h1></h1> tags to appear. Type the title of your page in between the <h1> tags.
- In the lower right of your window, click "Go Live". It will open a browser window and show you your document.
- Now let's add some paragraphs. Press enter so you are under the <h1> element.
- In VS Code you can type "p" and press enter for the <p> </p> tags to appear. Place the cursor between the <p> tags and press enter.
- In VS Code you can type "lorem25" and press enter to produce "Lorem Ipsum" with 25 words.
- Lorem Ipsum is placeholder text.
- Repeat steps 6 and 7 a few times changing the number for the Lorem Ipsum as you see fit. In my example, I will place 5 paragraphs.
- Look at your browser page. It should look similar to this:
1 |
<title>My First Document</title> |
1 2 3 4 5 6 7 8 9 10 11 12 | <!DOCTYPE html> <html lang="en"> <head> <meta charset="UTF-8" /> <meta http-equiv="X-UA-Compatible" content="IE=edge" /> <meta name="viewport" content="width=device-width, initial-scale=1.0" /> <title>My First Document</title> </head> <body> <h1>My First Document</h1> </body> </html> |
Congratulations! You've created your first HTML document with some content! If you want to learn how to make it look better head over to the "Intro to CSS" article!
Top photo by Janette Campbell with elements from W3C.


No comments:
Post a Comment